Before I start showing any sugar work techniques, I want to give you an idea of what equipment I use and how I set it up. I don’t have every toy and gadget I’d like to, but what I do have is enough to play around with most of the techniques I’ve learned in the past.
Keep in mind that you don’t need all of this stuff to get started in the wonderful world of sugar! I’m planning on showing as many things as I can think of that require little or no specialized equipment besides a candy thermometer. Most of this equipment is only necessary for pulled and blown sugar. While those are sort of the main attractions of sugar work for many people, they aren’t the only thing you can do with it.
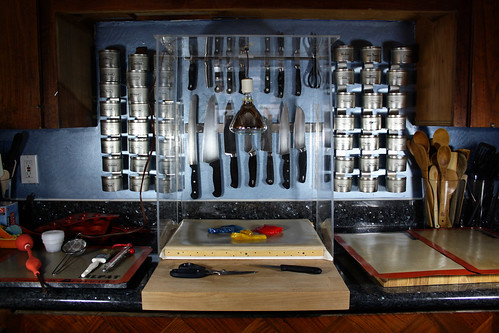
Here is more or less how I’ve been setting my equipment up in this kitchen. Fortunately, I have a nice tall space in the center of our long counter where the side-by-side “vintage” oven and range used to be. (I don’t miss them at all!) Center stage is my sugar warming box. Mine is homemade by the chef I learned to do sugar from. Compare it to a commercially-produced version. Professional sugar equipment is expensive. For the most part, I recommend you make or improvise any of it that you can. Part of the fun of doing sugar or chocolate work is taking creative trips to the hardware store! I managed to find a blog post written by someone who made his own sugar warming box.
The acrylic box stores in two parts: the sides connect to the back with with acrylic hinges, and the top has pieces that run along either side of each of the side pieces to keep it in place. I take the extra step of using clear packing tape to make sure nothing is going to move in the middle of my work. The top of the box has a slot running from back to front which the narrow plug of the cord from the heat lamp fits through.
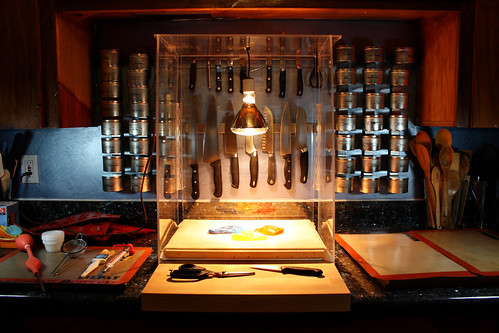
Here it is with the heat lamp on. It’s very bright and very hot, and you work right up in front of it. I always feel like I’ve been lying out in the sun for an hour after I’m done! The bulb hangs above a warming platform, which in this case is a Silpat nailed over a wooden frame. As the bulb heats the space below it, the warming box keeps the heat in, and the platform traps heat beneath it, helping to warm the sugar from both above and below.
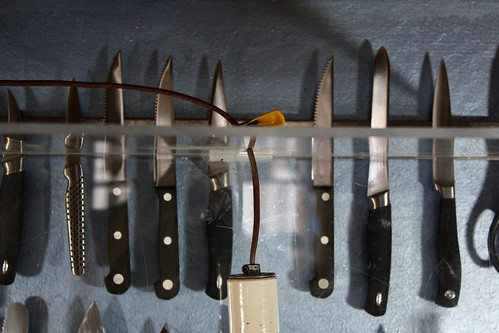
The heat lamp is adjustable thanks to a small clamp that I attach to the cord above the top of the box. It’s very important to be able to not only keep the sugar warm, but to be able to adjust the amount of heat you’re bathing it in by lowering and raising the lamp.

Here I’ve lowered the lamp all the way to remelt some leftovers from the last time I played around with sugar. You have to be careful because it will melt all the way if you leave the lamp down there too long.
Because we have granite counter tops, I don’t want to work with anything so hot directly on top of them. I use a large wooden cutting board from Ikea to shield the counters beneath the warming box. It has a downward lip in front and an upward lip in the back, which are great for keeping everything where it’s supposed to be. I also have a butcher block and a marble slab beneath the Silpats I have set up on either side to pour hot sugar onto or work with pieces that are in progress.
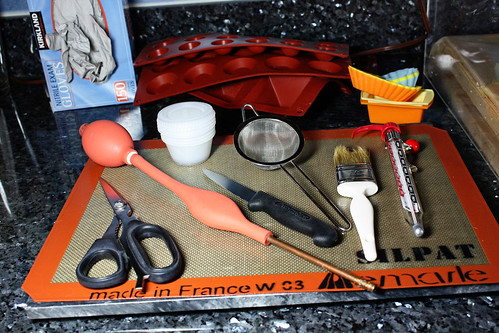
Here’s some of the other equipment I use: a good pair of kitchen shears with all-metal blades; a sugar pump (more on that in a moment); disposable plastic condiment cups for mixing food color with water to add to the sugar; a small, very fine strainer for skimming impurities off of cooking sugar; a paring knife for shaping blown sugar; a natural bristle pastry brush to wash down the sides of the pot while cooking the sugar to avoid crystallization and a candy thermometer (I would much prefer to use a digital candy thermometer, but I haven’t been able to find any of the three I own since the kitchen remodel).
In the back of the photo, you can see an overflowing box of food service-grade gloves. These are nitrile gloves, which we’re trying out because that’s all that Costco had, but I’m going to go back to latex because the nitrile seems more brittle and prone to break than latex during contact with the hot sugar. Also, I have a number of silicone molds, which are great for using up extra sugar by pouring it into them and letting the sugar cool in that shape.
The sugar pump is the one thing that I splurged on and got the very best. Matfer’s sugar pump is the best one I know of, and that’s what I got as a Christmas or birthday present back when I was really into learning the craft. Matfer also makes an “economy” sugar pump, as does Paderno World Cuisine. I felt the more expensive one was worth it, but if I had to chose between having a sugar pump or not having a sugar pump, I’d go economy, but I’d make sure to get a one with a metal tip on the end if I could for the sake of being able to easily attach sugar to it.
The good news is that you can do blown sugar without a sugar pump at all. All you need is a foot of very thin copper pipe, like this, except it’s a lot cheaper if you just buy your copper pipe at the hardware store. It takes a little lung power to do it, but I did make all of the bubbles for the top of the wedding cake in my last post with just a copper pipe.
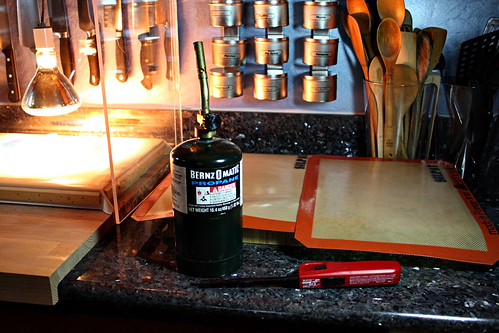
Another indispensable tool for any foodie’s kitchen is a blow torch. Don’t spend money on the wimpy little “culinary” or creme brulee torches. Get yourself down to the hardware store and get yourself a big-ass plumbing torch. I have both the skinnier, taller variety and the shorter, squatter one you see here. The reason the stout one is particularly good for sugar because it’s more stable when lit and left sitting on the counter while you work with both hands on a sugar flower. Blow torches are used all the time with sugar, for attaching pieces to each other, attaching sugar to a sugar pump, or bringing out a translucent surface on a piece of cast sugar, among many other things.
You will need a good, medium-sized sauce pan, preferably with a nice, heavy bottom, copper if you have it or can afford it. A kitchen scale is needed to measure out the proper quantities of sugar, water and (sometimes) glucose. A few Silpats are always useful, and I love having an extra large Silpat, not only for having plenty of room for the hot sugar to spread out on, but also for kneading and rolling out dough, sifting flour, etc. If you want to do blown sugar, a free-standing pet hair dryer is great for cooling your blown pieces under. If you don’t cool them quickly and evenly, they will deform thanks to gravity.
Other Sugar Work Posts at Pie of the Tiger:
Sugar Work Lesson 1: Casting Sugar
Cadbury Creme Brul’egg
Sugar Work (Pastry School Flashbacks)
Battlestar Galactica Cupcakes with Sugar Decorations

 Stumble Upon
  Del.icio.us
  Buzz
Buzz
Wow, that’s not so much a kitchen as a sugar laboratory methinks 🙂
Daily Spud’s latest blog post: Skip This For Breakfast
Yup, and that’s the fun part. 🙂
OOooo …. ok, i’m ready, hit me, how do we use all this stuff! 😀
Coming up, coming up, I promise!!
Hi. I can’t find any other sugar art blogs from you. Am I looking in the wrong place since you did the class 1 blog? If so please direct me to the next one.
Just wondering.. have you thought about offering classes or workshops in Seattle?
Alice’s latest blog post: You must make these! Almond Chocolate Toffee Crunchies
My husband says to say yes, because he’s been bugging me to do it for years. 🙂
I have vaguely thought about it. At the moment, my skill and knowledge level is not what it once was and I don’t think I could set myself up as enough of an authority to teach a class, but I’m interested in the idea of doing some sort of workshop or club or something. It’s fun working on sugar projects at the same time as other people.
You should think about offering this at one of the community colleges in their extended learning classes. I’m not sure how much you make but I bet there would be enough interest to teach.
hello chef canu send me the details about equipments for sugar carving where i can buy or order for my personal.
I really wonder.I saw in
http://www.youtube.com/watch?v=uep6FKZWRsY&feature=player_embedded
How your make the heating table.
I need your help if ,I want to set up my sugar shop like in the VDO.
You can design a simple plan for make understand for me.
Thank you
Phuket Thailand
Just wondering if you know of any good books on the subject? I cant find very many that have extensive information on techniques. Instead I am just finding books with a little info to get started but I have taken professional classes and I would like something a little more in depth.
Thanks for the wonderful information you have provided here. Starting on my own warming box in a few days!
So you just have the warming box frame and then the big wood cutting board on the bottom?
I’m working on making a sugar work box at home and am kinda stumped on the bottom parts haha.
Hi, I’m looking to buy a sugar board. One that is used to make the sugar baskets, to weave. But I can’t find where to buy one. Can you help me?