 Last time on As the Fondant Liquefies, we made cherry-flavored fondant and dipped maraschino cherries in it, in preparation for dipping them in chocolate. Really, that’s the hardest part of the whole process.
I decided to make another batch of cherries after the ones I documented in the original post and test the theory the Geeky Gnu and I had about pulling the hot fondant from the start instead of trying to cool it with a scraper on my small piece of marble. That and I wanted to prove I could do it all by myself. It worked very well, actually. After awhile, I got into a rhythm where I was kneading it like a cat, pressing half the mass of hot sugar down on the Silpat-covered marble with one hand and then the other half with the other, stretching it as high as I could each time. The fondant seemed to turn out much better–and crystallize much faster–this way.
Here’s what it looked like when I managed to pull it away from my fingers and deposit it in a bowl:
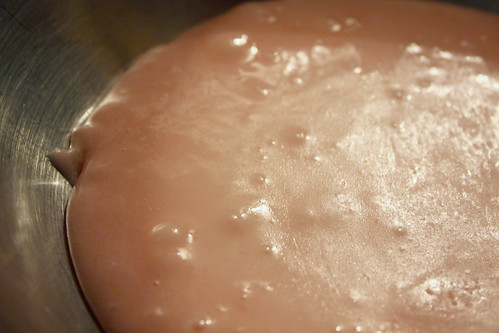
And here it is after resting it overnight:

You can see how matte and powdery it looks, which I think is what we were going for. The problem with agitating the fondant by pulling and kneading it by hand is that the corn syrup imparts serious levels of stickiness to the stuff. Latex gloves were useless, because the fondant instantly bonded to them and wouldn’t let go–fortunately, it wasn’t so attached to my bare hands. My arms and hands and shoulders got very tired from the process, but at the same time I was fascinated by just how sticky it was, gluing my fingers together to the point that it was difficult to spread them. The novelty of it (and, of course, the sense of accomplishment, after having the task taken away from me by the big strong men the night before) definitely compensated for any and all physical discomfort. It was way more amazing than tiring, and I had fun laughing at myself for getting into this literal mess.
Mr. Gnu also made another batch of fondant using a food processor or a mixer, but he’ll have to speak to how that worked out himself since I wasn’t there for the making or using of it. I hear it turned out well…and he didn’t have his fingers stuck together for twenty minutes.
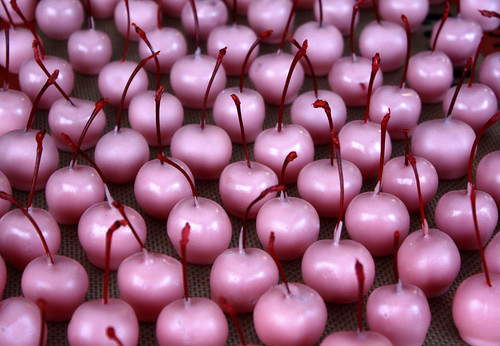 The fondant dipping went much as it had the last time, although I did pick up a new trick. Mr. Gnu noted that the cherries that leaked the most at the top tended to be the ones that had fondant coating their stems. When I dipped my own batch, I tried to be very careful not to get any on the stems, but it seemed more important to make sure every glimpse of red cherry was blotted out by pink sugariness. Once the fondant had set, though, I found it was easy to remove just the fondant on the stems with a quick twist of it around the stems between my fingers, breaking and crumbling it away and leaving the cherry completely coated.
All right, that’s enough about the fondant! It’s time to move onto the reason we’re all here: the chocolate.
First, you’ll want to temper your chocolate using your favorite method (if you have one; if not, I suspect a Google search could take you to a better explanation than I would give at the moment). You can use white, milk, or dark chocolate for this, depending on how sweet you want the results to be. I lean toward a full-flavored dark chocolate to contrast with the intensely sweet cherries and fondant. The Callebaut I picked up was only about 52%, but it’s a wonderful chocolate with plenty of cocoa flavor, not too much sugar, and a rich texture.
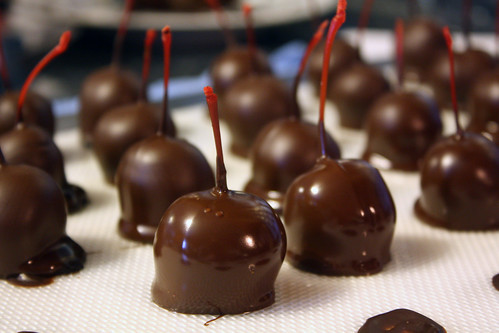 One of the biggest problems with chocolate-covered cherries is their tendency to leak through any weak spots in the chocolate, especially around the stems and on the bottoms, where the cherry will often sink through the chocolate before it sets and leave an instant hole underneath. I’d run into this when I’d made chocolate-covered cherries for the first time, so I tried a technique I found in Chocolates and Confections: Formula, Theory, and Technique for the Artisan Confectioner. I did a quick-and-dirty version of the advice he had, and piped discs of chocolate and let them set before I started to dip the cherries (you can see a few of them in the photo above). Then, I set each freshly-coated cherry onto a disc. It kept a layer of chocolate between the cherry and the Silpat, so for the most part it was a success, although I did have a couple where cherry syrup leaked out between the base and the chocolate around the cherry.
 After that, it’s just a matter of covering the cherries in chocolate. I found that holding the stem and dragging the cherry from side to side once or twice, letting the chocolate come right up to the stem, coated them nicely. Then I pulled them up, let a little of the chocolate drip off, and touched the bottom of the cherry to the surface of the chocolate once or twice to encourage more of the excess chocolate to stay behind. Once I was satisfied that there wasn’t enough chocolate to form a gigantic foot around the bottom on the tray, I set the cherry on one of the discs I piped beforehand and left it to set up.
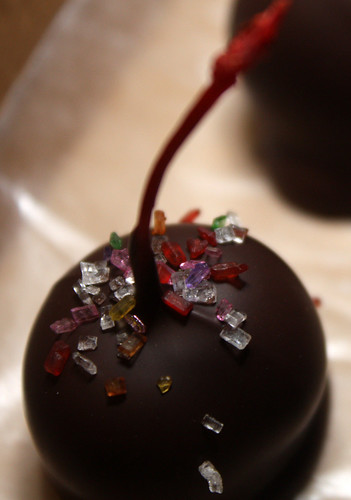

I also decorated some in the second batch with multicolored sanding sugar and sprinkles. Even though it looks okay in that photo, I don’t recommend using the sanding sugar on chocolate. It looked pretty at first, but as the chocolate set the sugar took on a murky quality, especially from a distance. The sprinkles, however, looked bright and cheerful. They were a hit with a lot of people, but I didn’t feel like the cherries needed the extra crunch from the sprinkles. There’s enough contrast between the gooey centers and the chocolate as it is.

This is an example of a leaking cherry, although often they’re more messy than this one. As I’ve noted before, the best way to avoid this is to make sure the cherry itself is completely covered in fondant, and then make sure the fondant is completely covered in an even layer of chocolate. Still, even if you’re careful, you’ll probably make a few cherries weep. Don’t worry. They still taste just as good, and they don’t seem to spoil any faster…not that I’ve ever had cherries around long enough to know just how long their shelf life is.
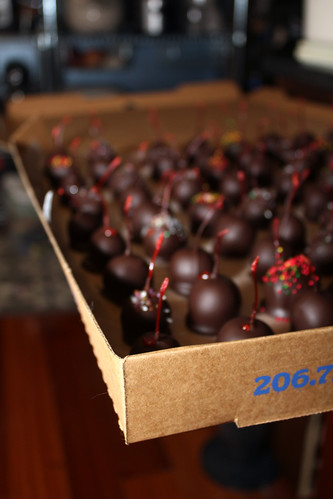 As for storing the cherries, if you don’t have a baker’s rack and zillions of sheet pans in your kitchen (someday, someday….), I recommend hitting up your friendly neighborhood pizza joint and asking very, very nicely for a few unused boxes. (Leave a generous tip in exchange, so they’ll be open to doing it again!) Mr. Gnu was kind enough to stop at Pagliacci’s on the way over and pick up ten extra large ones (we didn’t need that many, but I know they will get used in the future since I already am temporarily storing coconut macaroons in one, and I’ve used them to dry royal icing flowers in the past). Line the box with parchment or wax paper to protect the box from leaking cherries, and you’ll be able to reuse it.
If you use invertase in your fondant (see the first cherry post for more info on that), the cherries will need to sit out at room temperature for three to four days before they will be completely liquefied. If you don’t have invertase, the cherries will take up to two weeks to liquefy, which means you have to plan ahead. Invertase is easily purchased online and inexpensive, although I now have a larger quantity of it living in my fridge than I’ll use in my lifetime.
In the end, the cherries were a huge hit with everyone we gave them to. I wrapped two packages together for each family and couple in clear-topped plastic containers, one of cookies and one with chocolate-covered cherries and rainbow cookies. More than once, the person opening the present handed the cookies to the other recipient and hid the cherries for themselves! I think the best part about them is that they aren’t hard to make, but enough delicious ingredients and extremely pleasant work go into them that they truly feel like you’ve made them with love, which I know I did.
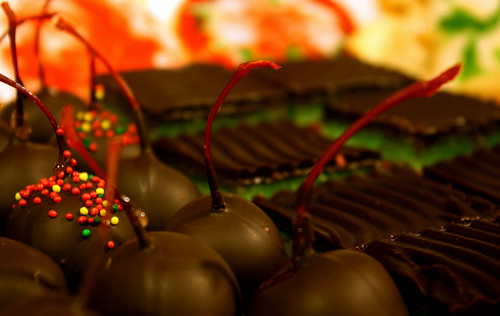
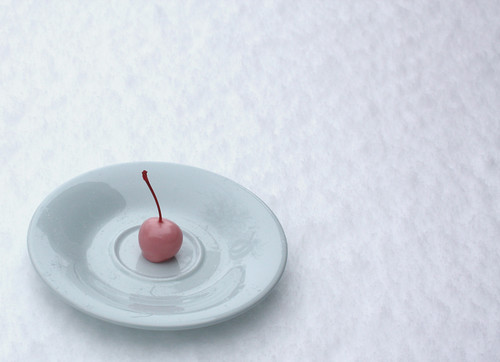
But I can’t help but wish that I could have given them dressed in just their shimmering, shiny pink sugar coatings. I suppose that’s one of those rare glimpse of ineffable beauty that are too fragile or fleeting to be seen by anyone but the cook.
Printable Recipe

 Stumble Upon
  Del.icio.us
  Buzz
Buzz
Wow, those are beautiful! Looks like lots of work, but it seems like it’s worth it. Great job 🙂
Thanks for finding me as it brought me here! This is a great blog and I look forward to following you! Gorgeous cookies below!!
Thanks for the friend request on Foodbuzz, I love your site! And those cherries look gorgeous.
Hi, I really want to try to do this!!
Your recipe sounds amazing!! Where do I buy invertase?
Thanks! I got mine at Chef Rubber, but it’s A LOT of invertase, and it needs to be refrigerated. I only used a few teaspoons of it at the most, I think, and the rest has been taking up room in my fridge ever since. Amazon has a small 1 oz bottle available. The shipping is steep, but it still works out to less money than buying the big bottle from Chef Rubber. I know there are a lot of websites that carry it, though, so you might just Google and see what you can find. If you have a local cake decorating supply store–an independent one, or one that caters to more serious cake decorators–you might try there, too. I think the one here in Seattle had it when I was last there.
Awesome! I just read about making a disc of chocolate to put the cherry on to keep it from leaking out the bottom, DUH! I’ve been trying for years to figure out how to do it and make it look nice, thank you sooooo much, you have kept me from pulling out to much of my hair!:-)
What is the shelf life of the chocolate covered cherries? I know they probably don’t last long enough to really know! But I know someone is going to ask me. Do they stay at room temp or can you, or should you refrigerate..?
Thanks.
Lisa
It takes some time for the centers to liquefy, and I think that was at room temperature. After that, refrigerate. I think the shelf life I originally read was two weeks, but I’m not sure with my newer recipe. It’s been a long time since I last made them…I’ll try to remember to find my recipe and check for sure.
Yay! I love Cella’s CCC. I am making these for Christmas along with a handful of other candies. I know this will be the star. I have had some trouble finding the invertase in my area but I know it will be worth it. Thanks for the detailed blog! So appreciated